Google Cloud Platform
How to launch a VM Instance using Snapshots in Google Cloud
Before you start installing WordPress on VM instance on Google Cloud. You must log in into the machine. You can launch a VM Instance on Google Cloud using this tutorial. After launch of machine log in into the machine using SSH. If you do not know how to SSH in VM instance you can follow this tutorial.
Step 1: Using below command we will install HTTPD server on the machine.

Step 2: Now we will start HTTPD service using below command.

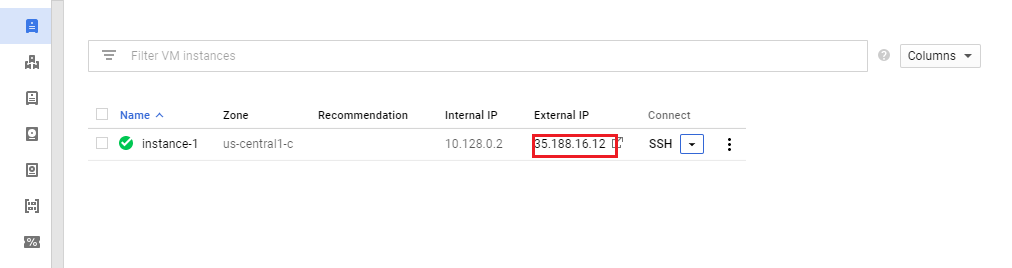
Step 3: now go to console and check you public IP of the browser.
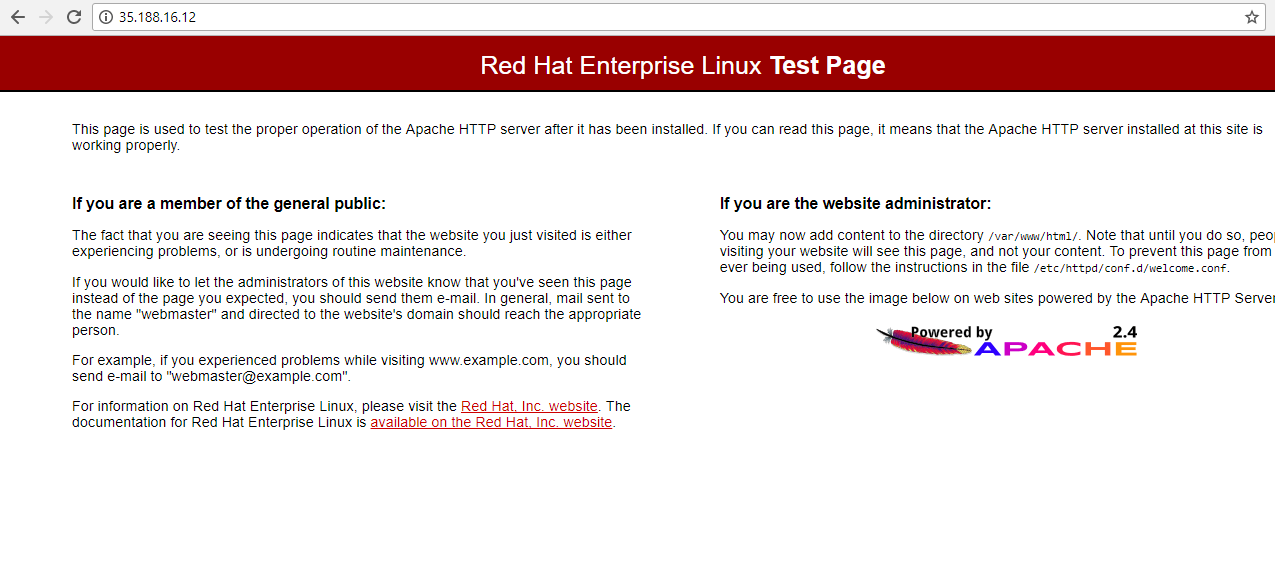
Step 4: you can test that you have successfully installed apache server by typing public IP of instance in your browser
Step 5: Using below command we will install PHP server on the machine.

Step 6:Now we will restart HTTPD service using below command.

Step 7: Now we will go to var/www/html directory using below command.

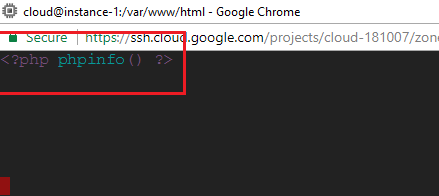
Step 8: Now we will create test.php file under html directory using below command.

Step 9: Write these lines in test.php.
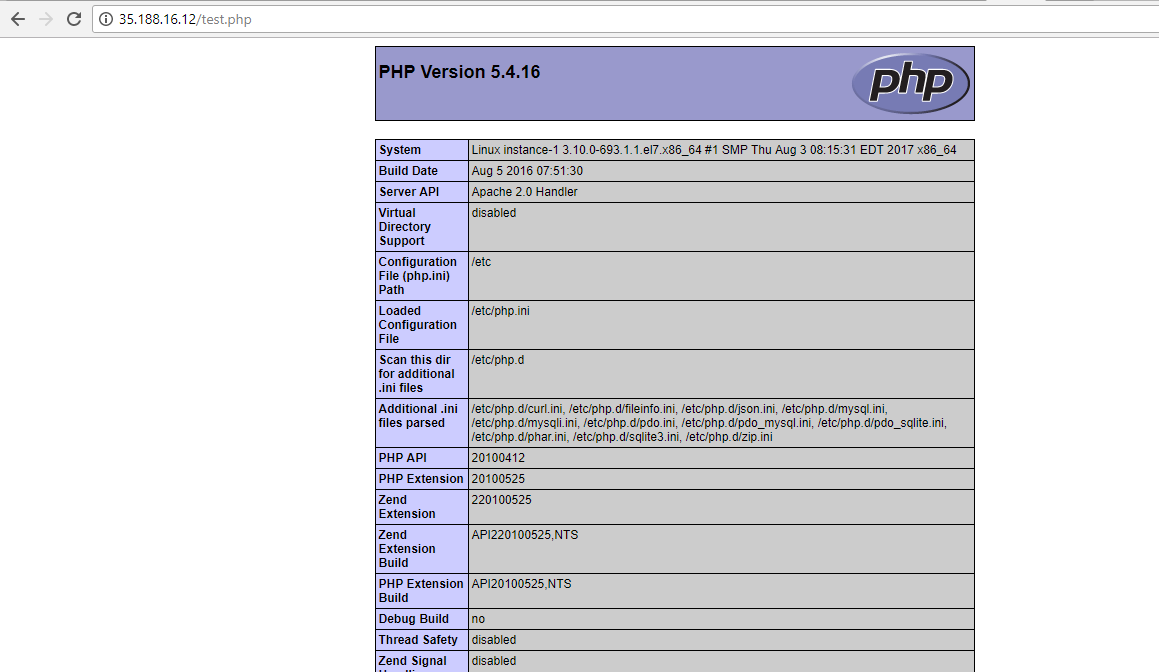
Step 10: Now go to your browser and type your public IP/test.php. You will see the below page if php is successfully installed.
Step 11: Using below command we will install Mariadb server on the machine.

Step 12: Now we will start mariadb service using below command.

Step 13: Now we will begin MySQL secure installation using below command. Just follow the instructions on the screen.

Step 14: Now we will login into Mariadb server using below command.

Step 15: Now we will create a database wordpress using below command.

Step 16: Using below command we will create a user and grant all privileges on database wordpress.

Step 17: Flush privileges using below command and type exit.


Step 18: Now we will move to home directory and download WordPress using wget command.

Step 19: Now we will unzip the downloaded WordPress folder using tar command.

Step 20: Now we will go to wordpress folder using cd command.

Step 21: Executes the following command to create wp-config.php file.

Step 22: Now we will edit wp-config.php file using below command.

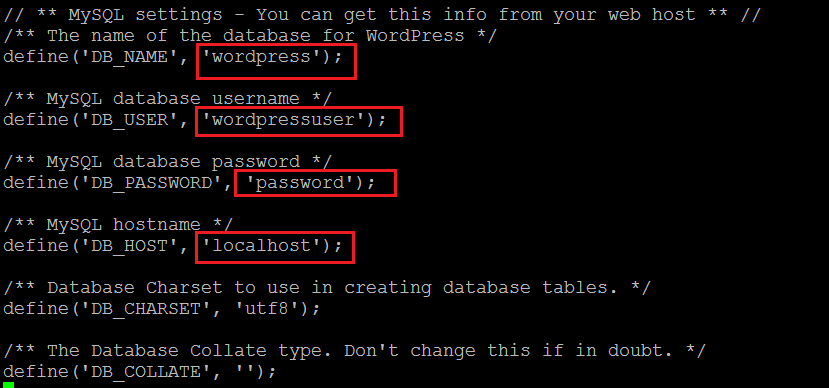
Step 23: Enter the foll0wing details show in figure.
Step 24: Use below command to copy wordpress folder to html folder.

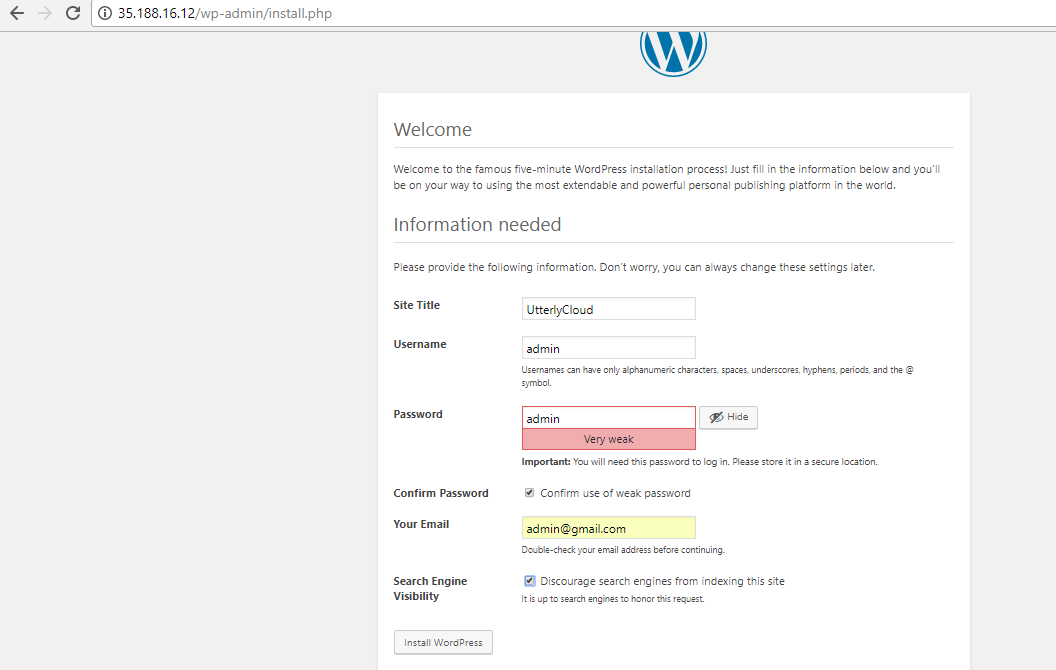
Step 25: Go to your browser type your ip adress/wp-admin in you browser.Enter the required information and click on install WordPress.
Step 26: After successfully installation click on log in.

Step 27: log in using id and password.

Step 28: After successfully log in you will see the following screen.

Step 29: Type your public IP of your machine in the browser.

Must Read Article
How to launch a VM instances in Google Cloud
In this tutorial we are going to launch a Compute Egine instance.
How to install WordPress on VM instance in Google Cloud
Before you start installing WordPress on VM instance on Google Cloud. You must log in into the machine. You can launch a VM Instance on Google Cloud using this tutorial. After launch of machine log in into the machine using SSH. If you do not know how to SSH in VM instance you can follow this tutorial.

How to create a VM instance in Azure
In this Tutorial we are going to launch a Virtual Machine in azure.
How to install WordPress on VM instance in Azure
Before you start installing WordPress on VM instance on Azure. You must log in into the machine. You can launch a VM Instance in Azure using this tutorial. After launch of machine log in into the machine using SSH. If you do not know how to SSH in VM instance you can follow this tutorial.

How To Launch EC2 Machine
In this article we are going to learn how to launch a EC2 instance. For this you need to have AWS account.
How to install WordPress on EC2 machine
Before you start installing WordPress on EC2 machine. You must log in into the machine.